Showing posts with label custom quilting. Show all posts

November 30, 2017

Feathers!


This was a fun one to quilt!  Lots of free motion feathers and ditching.


The first 2 photos have no ditching in the triangles... but this photo does, and they pop!
 Thanks Jen Klein!

Learn, Share, Quilt!
~karen

October 5, 2017

Frosting on the Cinderella Pumpkins

Delicious! 


This quilt belongs to Gayle...perfectly pieced and the fabrics are soooooooooooooo much better than what my photos show....
 I stitched in the ditch around each pumpkin and stems, created echoed diamonds around the pinwheels, cross hatched inside the pumpkins and feather swirled the background.  Super fun to quilt!!!  
Thanks Gayle!  

Cinderella Pumpkin Pattern is available here

Learn, Share, Quilt!
~karen

June 30, 2017

Fill Your Heart With Feathers Tutorial

I had the pleasure of quilting this beauty for Bev.  I hung on to it for far too long...secretly hoping she would forget about it!  L0L
She did not...darn!

He's a quick tutorial I shared with my followers on Instagram a couple weeks ago and thought i'd share it with you too.

Here goes....
I used a heart shaped template and stitched my outline.  Marked a vertical center line above and through the heart. I also marked side lines so I knew where to stop my outer feathers. I used a water soluble pen for these marks and tested it first to make sure those reds did not bleed... that would have been disastrous!! 


I started stitching the outside feathers first, beginning at the top of the heart in the inverted 'v' and created the feathers on the left top, down the side and to the bottom of the heart shape. Back to the top, I stitched feathers on the right side to the bottom of the heart, then added the dangled teardrop. For me, I found my feather shapes were more consistent when I started at the top each time. I know some of you could probably continue up the right side without stopping... nope, not me!


Moving inside the heart, I used the center line as my guide. Started at the top and stitched a teardrop then quilted feathers on left side, stopping each at the center line. Repeated stitching more feathers on the right side for the finish. 


Have you quilted a feather heart? How did you do it? I'm always curious to learn a new way. 


Here's more pictures of the finished quilt... Love, Love Love!


I use Hobbs 80/20 batting and So Fine thread on the top and bobbin.  The pattern is called Rolling Star and can be found by clicking on the blue link.  


Fill Your Heart With Feathers!!

Print Friendly and PDF

March 28, 2017

Milkyway

For those of you who follow me on Facebook or Instagram, you've already seen these.  

Quilt pattern is called Milkyway by Fig Tree Quilts and my friend Lila is the piecer.  


Can you tell i love quilting feathers?


I love this quilt!


Thank you everyone for helping me get rid of my 'old style' pattern covers! I still have a couple left of each pattern, except Tulip Crush is gone.  

Price for the 'old style' pattern covers are $6 each and that includes shipping!  USA only.  You'll find a drop down menu on the right side of my blog labeled Old Style Pattern Cover Sale.  These are mailed copies of my patterns...only difference is my pattern covers have been updated with my logo and larger photos. 
   Thank you!
~karen

August 23, 2016

So Pretty

I've been wanting to share this quilt for a while and give a shout out to Jane who continues to inspire me!  


Jane is 90.  I know...can you believe it?  

I told her daughter Mary i really wanted to quilt something special on this one.
I started with a sketch...ha ha...pretty rough, but it gave me a direction.


Here's the cute back!
Thank you Jane!  Looking forward to your next quilt!
~karen  :)

I'd love to quilt for you!  Click on 'Why Me?' for details.  

June 14, 2016

Happy Flag Day with Lady Liberty!

I've been plugging away on Lady Liberty for years! 
Between client quilts, i had a chance to slip it onto my longarm.                                                        Yippee!!  


If you are on Instagram...you'll find me there too!  I posted this picture recently sharing my quilting design idea.  

\\
Someone asked on Instagram if i would share how i did the quilting.  I like feathers... lol 

First, I drew my design onto a photo copy of the pattern.

I marked my lady's skirt with a dividing line (as you can see by the white ceramic pencil mark) plus an additional curled line.  These lines remind me where to stop and when to curl the feathers.  Then quilted free hand feathers.

They are never perfect or the same...but we're all different right?

A few feathers in her hair, a simple necklace and star.

In God we trust was quilted into each sash.

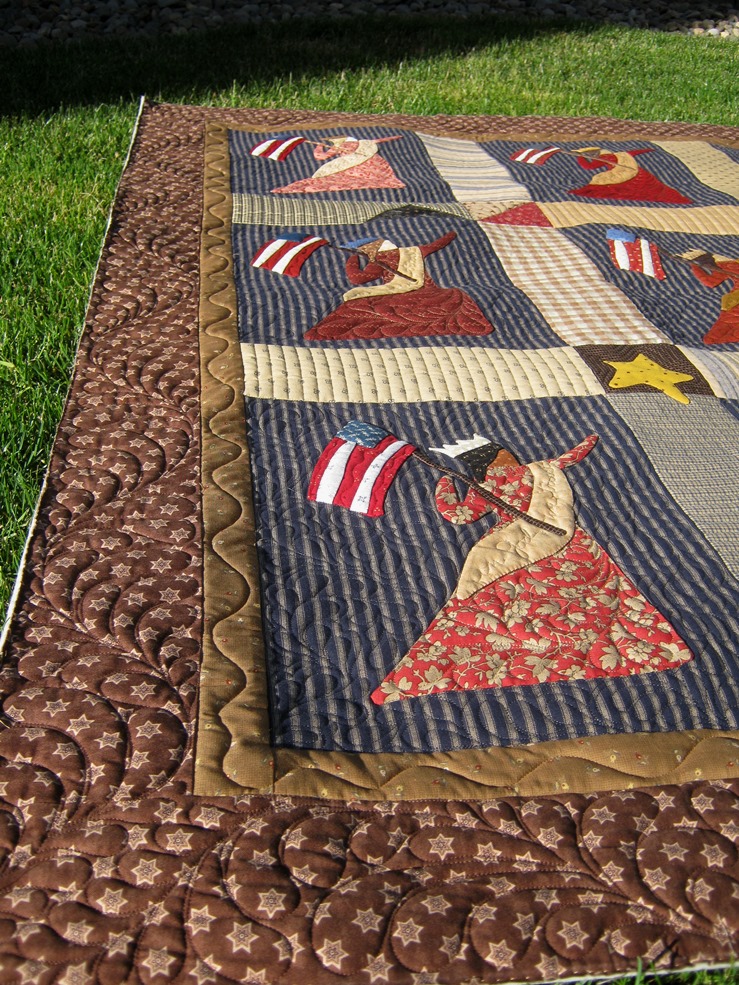
The background fill behind each lady is what i call feather fronds.  Little snippets of connected feathers.  Wavy lines in the flags, straight lines in the sashing areas using Linda Hrcka's QP Edge straight ruler.  A bit of echoing and micro-stippling to make a few freehand stars pop!


The inner border is a simple wavy line.  The final border...more feathers!  I used Linda's #12 QP Curved template to mark the spine then added the feathers freehand.  Super fun!

Before i began all the fun quilting, every block, seam and applique edges were stitched in the ditch.  


Mondays are my Play~Days with friends.  Yesterday we made flags!
Wool background, red cotton stripes with a blue cotton field.  Pearl Cotton for french knots and running stitches.   
A stick plus tacky glue...and we have a flag made in time for Flag Day!

Make every day a Fun Day!

Links to where you can purchase Lady Liberty and Sewline Pencils

March 7, 2016

I Call it Gearish...

Typical feathered wreaths are created by stitching the rounded part (or top) of the feather toward outside of the wreath.  The inner feathers are stitched in the opposite direction...the rounded part of their feather is facing the center of the wreath. 


 Practicing my feathered wreaths before committing them into Rita's quilt... 

 ...i chose to stitch my inner feathers pointing the same direction as my outer feathers.  


See the difference?


I call my version...Gearish.  Both sets of feather 'tops' are stitched in the same direction...creating a movement completely different than the 'traditional' feathered wreath.


LinkWithin

Related Posts Plugin for WordPress, Blogger...